Friday, January 17, 2014

pepper dress to coat sew along - day 3, final construction and finishing touches

okay ladies - here we are on our very last day. and a friday at that. i love fridays!

if you are just now joining us, check out the information on the sew along that starts here. then, you can see day 1 and day 2 to catch yourselves up.

let's jump right in! yesterday was a big day. we got both the inner and outer coats finished and button tabs and trim added. fun times in the sewing room. today, we will put those 2 coats together and add buttons and button holes to make it functional. then your little supermodel will shine in her pepper coat! i know i for one will be envious!

alrighty. this step is like the wost ever to take a picture of. but, lay your outer coat right side up on a flat surface. you want to maneuver it in a way that you will have what i call a "box figure." meaning you want it looking like there are 4 sides - right side, top, left side and bottom. run with me here, trust me. ;)


now, what you want to do is to lay your inner coat right sides together on top of the outer matching up the shoulder seams, the sides (especially where the bodice meets the skirt), bodice and bottom. pin like there is no tomorrow. this step is in no hurry. promise. you will pin all the way around the 4 sides leaving the sleeves alone to hang out in the middle and have a bell sleeve party.

user friendly tip - i found it is easiest to go ahead and pin the 2 sides and the top. then, once those are secured to each other, you can fan out the bottom (due to the gathered skirt) and pin it accordingly.

ps - would you cry if i told you THIS was the point i got to before i realized i failed to cut my bodices mirror image? seriously. i cried. and then i got so mad at myself! thankfully i had extra fabric for the inner!

once all 4 of your sides are pinned together, you will have this. 


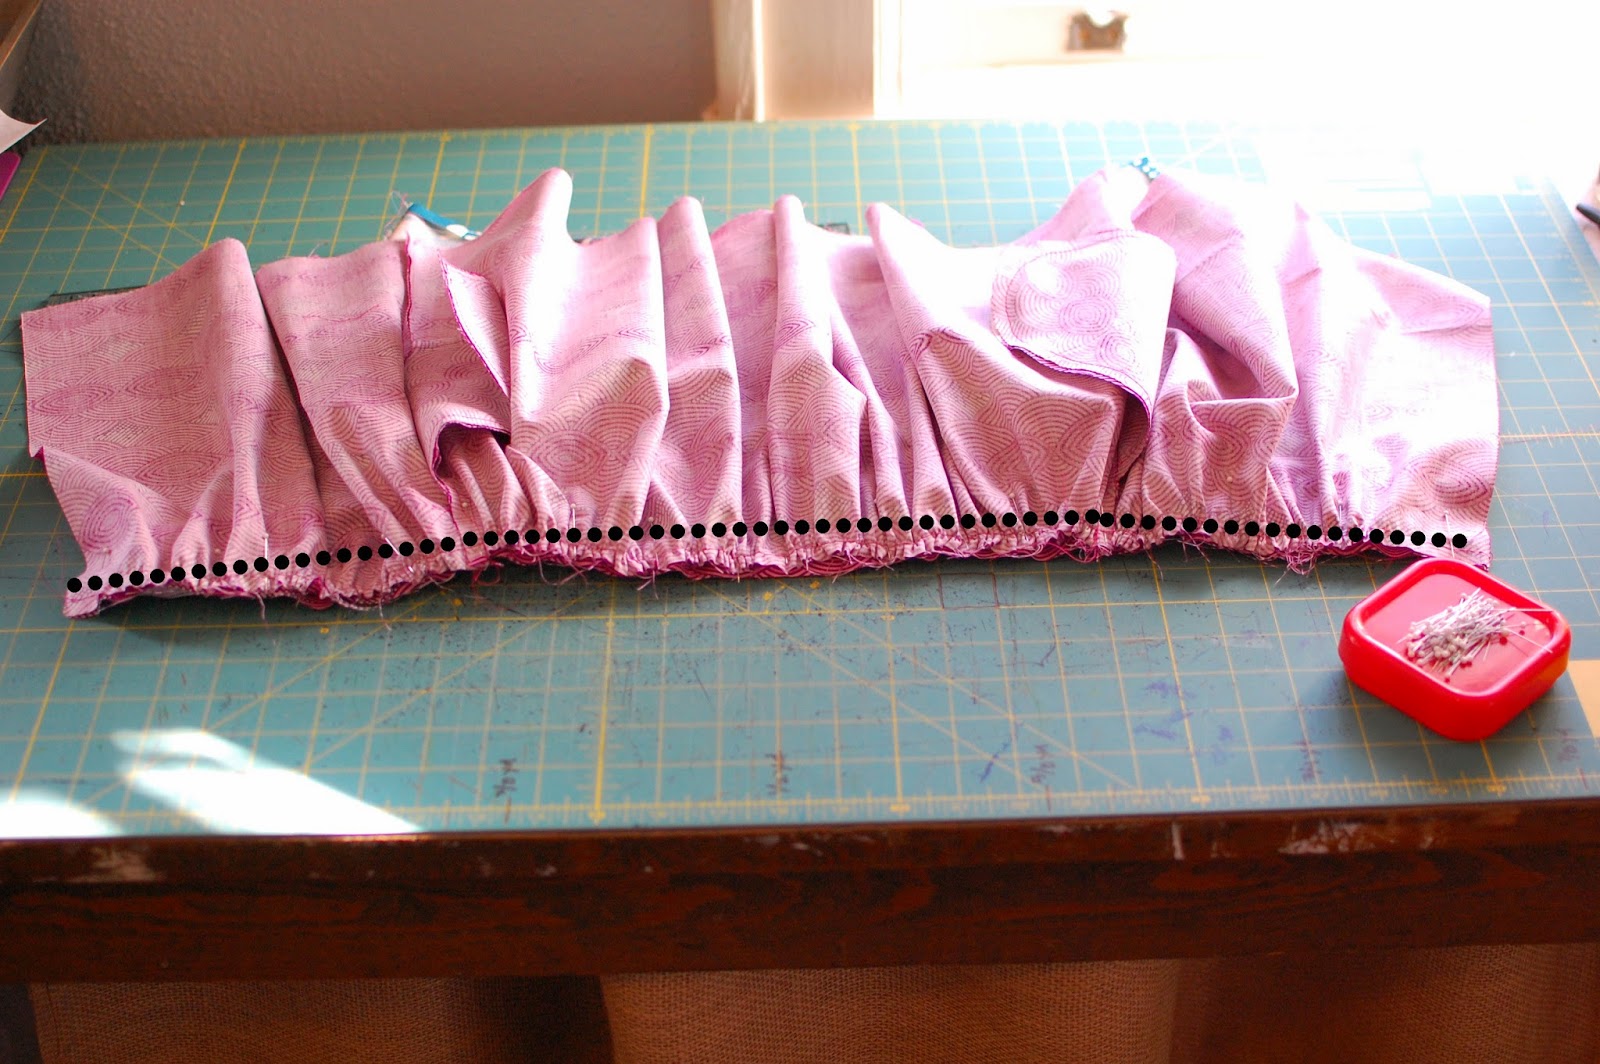
thanks to my vanna, i thought it may help to see this held up and not laying on a surface. you will then sew, very, very carefully around all 4 edges with a 3/8" seam allowance as shown by the black lines. just to clarify - that bottom will flatten out. the lines got all crazy because i tried to show how to sew with it all draped like that. this is one of those times where it would have been nice to check out my photos to see what i had to work with before i sewed it all shut. oops - if this confuses yall, please let me know!

once you have it all sewn, very carefully clip your curves just as you would in the pattern. then, the best part...and the part i sweated buckets over when making because it was the test of time to make sure it all pulled out right sides okjay. reach into one of your sleeves and work on pulling the entire coat through that sleeve. trust me, it makes no sense at all, but it works and you will feel the need to squeal when you have it done. :)

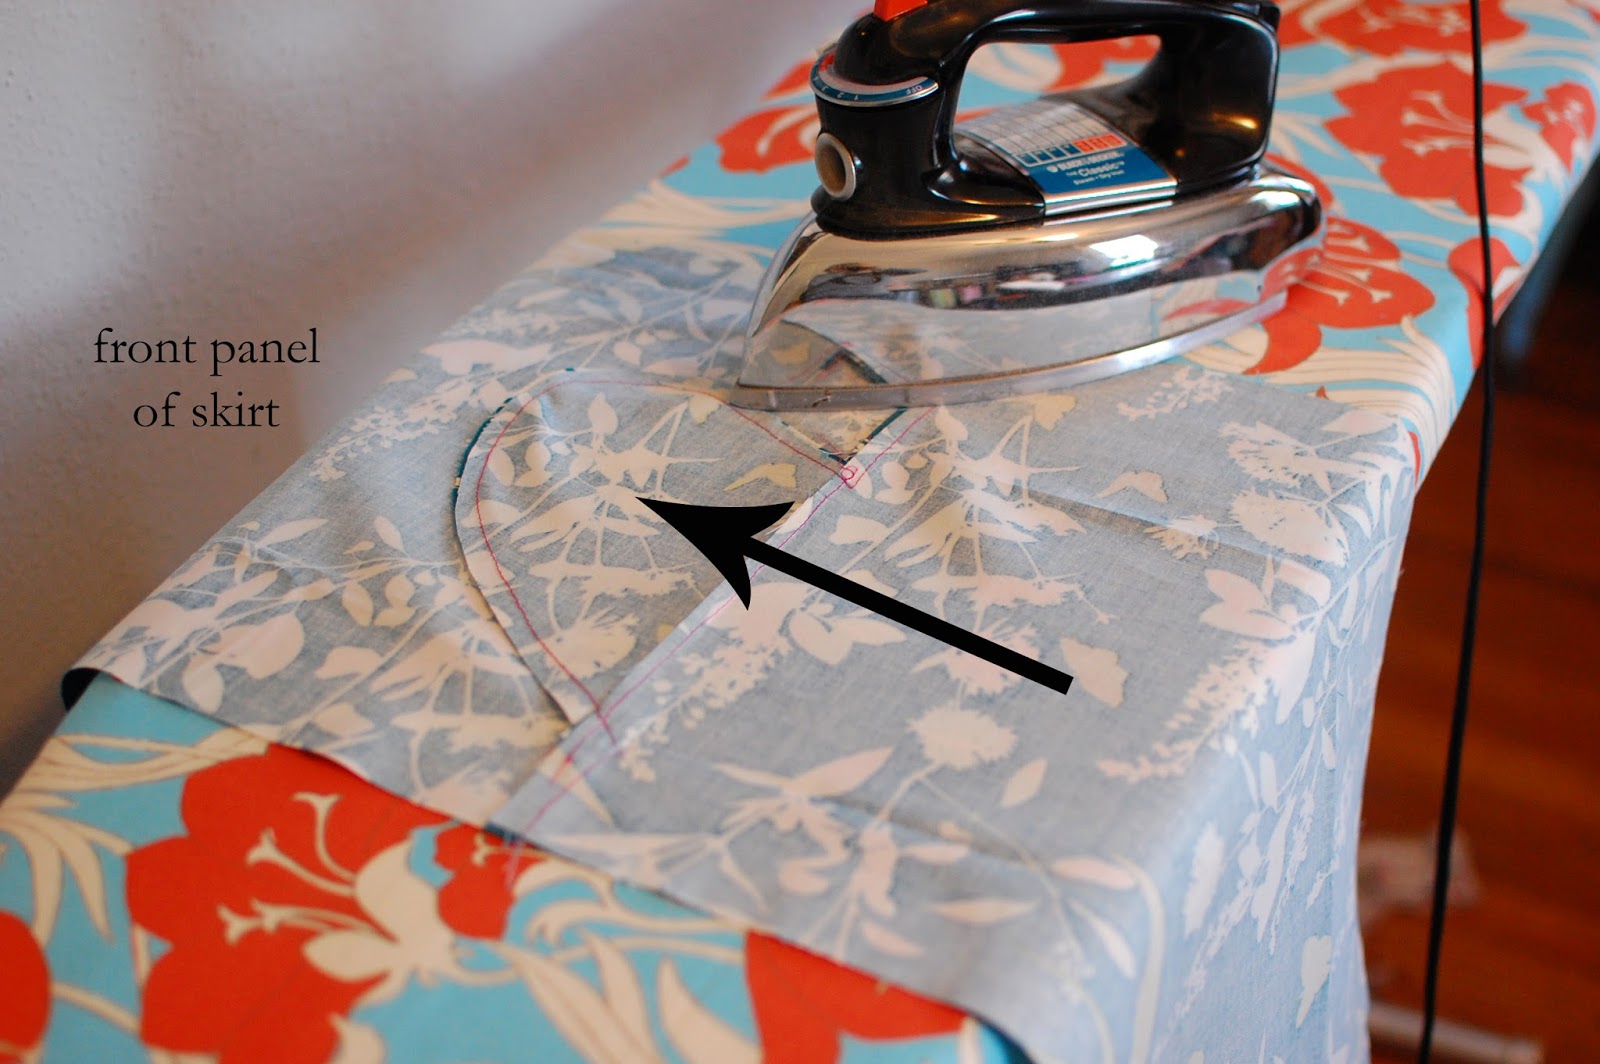
take it over to the ironing board, put on your comfy shoes and some good tunes and take your time and press this beauty out. i haven't forgotten the sleeves. promise we are about to get there but the pressing of this coat just might be the most important step (other than cutting mirror images, haha). 

once pressed - let's turn our attention to the sleeves. reach inside and pull your inner sleeve down all the way and press that 1/2" hem that you pressed earlier.


then, pull the outer sleeve down over the inner and re-press that 1/2" seam as well. you see, is it all starting to make sense?? it is so much harder, in my opinion to press once sewn as a sleeve, so that is why i had y'all press it early. methods to the madness. ;) now, match up your sleeve seams on both the inner and outer sleeve and pin together.


take over to the sewing machine and top-stitch around the very edge of the sleeve to stitch the two together. remember since you are going to see both sides to use coordinating thread for your top needle and your bobbin!


when finished, you should have a stitch that looks like this. now, repeat with other sleeve. ps - this is a fabulous spot for a decorative stitch!


and guess what girls - the construction is DONE. now all we need to do is to add the button holes and buttons. we are just a few steps away from an awesome coat!!

first up - button holes. okay, i am going to give directions for a completely reversible coat option. meaning you will have buttons for both sides. if you are just using the inside of your coat as a lining, then you can follow the directions just as they are in the pattern for placing the buttons. first things first. it is very important that you choose buttons for both sides that are roughly the same size. why you may ask - well, you will only have 1 size button hole, so you need that to fit both buttons, inner and outer. mine are like 1/8" from each other, but that small amount of discrepancy is fine, i would not go over 1/4" difference in size.


pick the largest button to use for your button hole. place it in your sewing machine's button hole foot before you forget. and please don't panic when you cannot find this button later. one day i will learn to check my button hole foot first.


now, it is button placement time. i wont go into much detail here, but if you reference page 16 in the pattern i go into all kinds of detail. :) i like to eyeball button placement. here, i have my coat placed on my dress form and am using pins to hold the buttons in place. but, as you can see in the pattern it is just fine to have it laid on a flat surface. i am only using 2 buttons for the coat, but you can use as many as you choose. you can also just do one right around where the bodice and skirt meet. that would allow the top of your bodice to flap over revealing your pretty inner fabric too. once you are happy with button placement, mark your spots just as you would in the pattern for the button holes and then head to the machine and sew the button holes. now, just as with the sleeve stitching, remember that you will be seeing both sides of this coat (if you are making it reversible) so make sure to use the coordinating thread for the bobbin.


once your button holes are sewn, open them up as instructed in the pattern on page 29. now, time to mark our buttons. first, mark your outer fabric buttons. this will be the only marking you will do as the inner buttons will need to be very close to this mark as well, so we will just work off the one mark.


to sew buttons on both sides, you will have to hand sew one side. you will sew one side of buttons with your machine first, then hand sew last. the lazy smart girl behind BG picks the buttons that are easiest to hand sew to hand sew. :) for instance, my inner buttons have 4 holes to sew while my outers have 2. so, i choose to sew my inner buttons on first by machine. 

since the buttons on both sides will use the same button holes, they need to be in the same place. however, it is near impossible to sew them in the exact same place and i have found it makes it harder to use the buttons if they are on top of each other. so, for your inner side of the coat, you will place your buttons 1/8" away from the outer buttons toward the inside of the bodice. that sounds confusing. here is a picture. see how the green dots (where the inner buttons will be) are 1/8" off from the outer buttons?


so, head over to the machine and sew your inner buttons on where marked 1/8" off from your outer button markings. if you have pins marking the spot, make sure to take those out before you ruin your machine. i had those there for picture purposes only as i had my markings on the outside with a pen. 

side note: if you outer buttons have 4 holes, then please do this backwards, meaning start with those first. i want you to make it as easy as you can for yourself too!


now, this is what it will look like on the inside where the buttons are. you can't see the outer button markings can you? awesome. that is the point. we are on the verge of magic here ladies.


 and here is what the outer looks like. see how i still have room for my outer button but they wont be right on top of each other?


 now for the tricky part. grab a comfortable seat and find some more good tunes (i prefer golden oldies, i heart them) as this next and LAST task takes some patience. you are going to now hand sew the outer buttons on. however, since you have buttons on the inside, it wont go as easy as it usually does with those inner buttons in the way. so, work around this inner button as best you can working the needle under it for good positioning and sew the outer buttons in place.


 once sewn, see how you can no longer see the stitches from the inner button? what did i tell you about magic? the buttons work together to hide each other's stitching. now, how about that for some teamwork? :) now, continue hand sewing your other outer buttons.


 and guess what ladies? you are so done with your pepper coat. pat yourself on the back big time! you will certainly impress the pants off of people when you tell them that yes, you made that. :)

i hope you have enjoyed this sew along! maybe you learned something new along the way, i know i did! if you have any questions or concerns, please email me or post to the brownie-goose lovers page on facebook. and speaking of the page - i cannot wait to see your creations!

thanks again ladies for all of your fabulous support. i couldn't make it without such amazing sewing friends. now, off to finish the upsize of the sleepy jeans. :)

xoxo - amy


Thursday, January 16, 2014

pepper dress to coat sew along - day 2, pocket, skirt and trim construction

just a warning - it is late and my brain has already gone to bed so excuse any nonsense that may occur after this sentence. i was supposed to do this while nash was at school today but i got too focused on the sleepy jean upsize. oops. so now with 2 large helpings of macaroni and cheese and the kids in bed i am trying my very bestest to focus. ;)

so, day 2. here we go! if you are just now joining us, check out the info on the sew along here, and day 1 progress here.

without delay, let's get started! now that we have our bodices and sleeves constructed, let's turn our attention to the skirt and pocket portion of our coat. first up - cutting of the skirt pieces. you see, in the dress pattern we gather the skirt in the round to fit the circumference of the bodice. here, we will basically think of it as 3 sides: the front right, back and the front left. so, first things first, let's separate our skirts into 3's. take ONE of your skirt rectangles and cut it in half width-wise. the easiest way to do this is to fold it in half width-wise and cut up the fold.

to bring math into it, maybe to help out, i am working on a size 4. (let's just focus on the outer fabric right now.) i have 2 rectangles that are 12.5" long (remember i took 2" off) by 34" wide. i am going to take ONE of these rectangles and cut it in half so that i now have 2 that are 12.5" tall by 17" wide and then i also have my original rectangle that is 12.5" tall by 34" wide. this is where you will see what i mean by 3's. the widest is the back,  and the 2 i just cut are the front left and front right. clear as mud? good. now do the same thing with your inner fabric. once finished you should have 6 rectangles total. 

now that is out of the way, set your inner skirt pieces aside and grab you outer skirt pieces and pockets. let's start with your front 2 pieces. lay them right sides up on a flat surface and grab 2 of your pockets and place them about 1.5-2" down from the top as shown below. i have used 1.5". pin these in place and then take over to the sewing machine and with a 1/4" seam allowance, sew the pocket to the skirt as shown by the dotted line. using a smaller seam allowance helps the pocket to remain hidden inseam. that is our fancy pants for today. :) if you do not want to do pockets - skip on down a few steps and continue with the construction of the skirt panels.

 
now, do the same with the other 2 pockets and the back panel of your skirt. make sure that you use the same distance to place your pockets from the top as you did on the front 2 pieces, in my case, the 1.5". also, don't forget that 1/4" seam allowance!


take all 3 skirt panels to the ironing board and with right sides facing up, iron those pockets out to the side as shown below. now, if you are doing inseam pockets for your inner fabric as well, repeat these previous steps for the inner.


construction of skirt panels: (if you are not doing pockets, this is where you will pick up and instead of sewing around the pocket, just sew a straight side seam) place your back skirt panel right sides up on a flat surface. then, place your front panels on top right sides together matching up the sides and pockets and pin. then, sew with a 3/8" seam down the side seam and around the pocket as shown below. repeat with other side.


once again, no need to finish these seams as they will be enclosed. take over to the iron and press the seam and pockets toward the front panel.


you have now constructed the outer skirt for your coat. repeat all of the steps above with your inner fabric. it was at this point when i started to have flash backs of my assembly-line sewing in the earlier days of BG. :)

okie. now let's focus on finishing the bodice construction so we can get that skirt attached. lay one of the bodices you completed yesterday (i have now photographed the inner fabric for mine, don't let that throw you off) on a flat surface right sides together. match up the underarm, sleeves and sides and pin in place. sew from the sleeve opening to the underarm and down the side with a 3/8" seam allowance. now, remember how we went ahead and "hemmed" the sleeves? to sew around that hem, we will open the pressed fold and sew through it - see below.

see how i pinch open the fold here?


 and again, pinching it open while i sew. this will all make sense later, pinky promise!


again, no need to finish seams but do take over the iron and press them out. when finished, one of your bodices should look like this. from left, front panel, back and then front panel. repeat these same steps with your other bodice. it is now time to work on gathering that skirt to attach. eeeeeeks!


lay one of your skirt panels on a flat surface. you are going to sew a gathering stitch along the top of the skirt panel. make sure you have the top and not the bottom. someone i know was too busy harmonizing with the indigo girls and gathered the wrong edge only to have to rip later. oops. just as sweet brown said, "aint nobody got time for that." start about 1/2" in from one of the front panels, run the stitch all the way across that one, through the back panel and then across the other front panel ending about 1/2" from the raw edge. if you are unfamiliar with gathering, please see the glossary at the end of the pattern for more instructions.

 
now, remember how i told you earlier that i would rather poke eyeballs than gather in the round? well, 'tis true and if you feel the same you are about to get excited. we are about to gather to an open panel. yay, the clouds just split and i heard the singing too. :)

this is the best way i have found to do this. place your bodice right sides up on a flat surface opening it as much as it allows (since the side seams are sewn up). now, place your skirt panel right sides together with the top (where you made your gathering stitch) matching up with the bottom raw edge of the bodice. match up the 2 sides seams of the bodice with the side seams of the skirt panel and pin in place.


okay, work that gathering stitch (you may have to remove the pins to gather it beyond) so that your skirt panel fits the bodice. make sure to keep all of your side seams aligned. it would be tragic to have a wonky side seam after all of your hard work! as you gather, pin in place. then take over to the machine and sew along that edge. i will usually use a 1/2" seam allowance here. you are welcome to do the same, i just find that it makes the gathers look a bit neater. however, you are certainly allowed to do a 3/8" as well. either will work fine!


now, for good measures, once your skirt panel is sewn to your bodice, remove that gathering stitch. i know, moan and groan, but yall this is one of those steps that i find really helpful although not seen. methods to my madness. and speaking of methods, although this seam will never be seen, i like to finish it. it gets quite bulky if not, so just run a finishing along this seam however you prefer. then, take over to the iron and press that seam up towards the bodice. this is personally one of my fave steps. there is something about seeing all those pretty gathers all lined up that makes me giddy! now, totally up to you here about top-stitching that seam. i am a top-stitcher at heart, but i chose not to in this instance. so, your choice! now, repeat all of those steps with your other bodice and skirt.


 time to turn our attention to the beautiful piece of trim that goes around the bodice. oh i swoon! on the dress the trim is only on the bodice portion. however, i found on the coat since the front panel opens that it would be fantabulous to make it extend all the way to the bottom. so, measure one of the finished coats from the bottom of the skirt portion, up along the curved bodice, around the neck and down the other front bodice as shown by the dotted line below.


now, reference page 9 in the pattern tutorial for further instruction on your trim. since this coat is reversible, the trim you choose will show on both sides. because of this, i decided to use a piece of cream knit to ruffle. since knit wont fray, i left the edge raw and it gives a nice, soft detail to the coat. plus, it was easy. let's be honest here. ;) since i am ruffling my trim, i took my measurement from above and multiplied it by 1.5 just as in the pattern. thankfully i was lucky enough that it fell into the fabric width of my knit so i just cut a long strip that was about 1" (since it is knit, there is no need for me to fold over lengthwise as shown with a woven in the pattern) wide and then ran a gathering stitch along the edge. i didn't go into much detail here because it is all laid out in the pattern and i didn't want to be too redundant.


now, you can start your trim either at the bottom of the skirt or at the top of your squared bodice (what i chose), but make sure to taper your trim just as i discussed on page 10. see below how i taper it off just a bit? this is important in reducing the bulk of your seams.

note - i added this later as i woke in the middle of the night afraid that someone may put the trim on the wrong part of the bodice. the trim goes on the front bodice piece that has the curved edge. okay, back to bed.


tapering along the bottom skirt edge as well.


 pin that trim in place and then baste to your coat panel with a 1/4" seam allowance so it stays in place but we wont have to worry about that seam being exposed later. :)

if you want to do button tabs, now is the time to do so. reference page 22 in the pattern tutorial and follow the same steps. however, since we will sew the 2 coat panels together, go ahead and sew your buttons to the tabs (page 29) now since it is crazy easier to go ahead and do so before we get it all stitched up. trust me said the girl who didn't.

okay ladies - enough work for today. but if you are like me you are like, "NO lady! let's keep going!!" i am not a fan of interrupted time in my sewing room. i am also the mother of young children, so we all know how well that works. haha. 

tomorrow we are going to come back and actually finish up our coats! i cannot WAIT to see what you ladies have cooking in your sewing rooms - share some pics on the brownie-goose lovers page! also, if you get stuck - holler on this page as we can hopefully all help each other out.

off to bed i go. sooooo sleepy!

xoxo - amy

Wednesday, January 15, 2014

pepper dress to coat sew along - day 1, bodice and sleeve construction

welcome ladies - if you are just now joining us, check out the details of this sew along here. in a nut shell, we will be transforming the pepper dress pattern into a fully reversible coat that depending on fabric choice will shine in any weather! let's get started!

ps - hanging my head in shame...i still don't have pictures of my little one in it. please don't throw stones!

today we will focus on getting everything cut out (which seems like a TON considering this will basically be 2 dresses you will cut out) and starting the construction of the bodice and sleeves.

what to cut:
choose the size you want to go with (the pepper dress isn't a super fitted dress to start with, so you really don't need to size up for a jacket fit unless you want to use a more restricting, heavier fabric) and make sure you cut the bodice for the LONG SLEEVE dress, please don't use the sleeveless bodice. 

for the sew along, since this will be fully reversible, i will refer to the fabrics as inner and outer fabric. hope that doesn't confuse anyone!
this is what all you will cut:
  • bodice front right - one of inner fabric, one of outer fabric. MUST BE MIRROR IMAGE of each other, trust me. i wasn't paying attention when cutting and had to rip seams and re-cut halfway into the dress. it wasn't a good time to be had.
Just a little aside for those that aren't familiar with "mirror image." This is how I cut mirror image pieces. Place your fabrics either right sides together and place the pattern piece on top and then cut out. Doing this in fact gives you two pieces of fabric that are mirror images of each other. So, for the bodice pieces, place your inner fabric right side up and then your outer fabric right side down (so the right sides are touching each other) and then cut out your piece. Mirror image is important when you have pattern pieces that directional or pattern piece shape is important. Hope this helps!!
  • bodice front left - one of inner fabric, one of outer fabric MUST BE MIRROR IMAGE (if i could make this flash and beep at you i would) of each other.
  • bodice back - one of inner fabric, one of outer fabric on fold
  • sleeves - 2 of inner fabric, 2 of outer fabric
  • sleeve cuff - see instructions below as i have changed it from how the pattern has it laid out due to it being reversible.
  • pockets - 4 (with 2 sets of mirror image) for outer, and 4 (with 2 sets of mirror image) for inner. you don't have to do pockets for both fabrics, but i will show you how to make them for both in case you are interested.
  • skirt - following pattern dimensions, 2 of each fabric. this gives it the fullness it needs. as i stated in the previous entry, i took about 2" off of the length of the skirts to make it a little shorter for a coat since my lou is such a peanut.
  • button tab - 2 for each side, just as per pattern. so, if you want a button tab on both sides of the jacket, you will need to cut 4.
okie dokie. let's get started. since i did the sleeve cuff a bit different, let's start there. in the pattern, the sleeve cuff gets folded over and sewn to the bottom of the sleeve to give the bottom of the sleeve some weight and a nice finished edge. but, since we will sew both of our outer and inner sleeves together for the coat, there is no need for all of that extra weight. so, here is how we will make a change. i am making the size 4, so the pattern tells me to cut 4 3/8 by 20. let's keep the length of 20, but here is how we will change.

sizes 6-12 mo to 2: cut 2 of each fabric 2 3/8" wide by 20" long
sizes 3-12: cut 2 of each fabric 3" wide by 20" long

clear as mud? just in case i lost you, you will have 4 sleeve bands cut.

as you can see, clearly the band is is longer than the bottom of the sleeve, disregard that as we will cut it down later. also disregard that seam in the middle, some cheapy mccheaperson tried to make do with as little fabric as she could and ended up piecing things together.


now, you want to place your cuff right sides together along the raw edge of the sleeve and pin in place. sew along the bottom edge as shown below. seam allowance will be 3/8" just as in the pattern. repeat with other 3 sleeves and bands. there is no need to finish these seems as they will all be enclosed. fancy pants.


once sewn, take all of your sleeves to the ironing board and press the seam up towards the sleeve.

now, we will address the extra fabric of the sleeve band. you want to trim the extra band fabric following along the angle of the sleeve bell as shown below by the white line to the left. what i have found is the easiest is to place a ruler along the edge of the sleeve and use my rotary blade to nip the rest of the band. repeat with all 4 sleeves.

           
when finished, you should have a sleeve that looks something like this:


now, because i hate pretty much doing anything in the round, i am going to show you my nifty trick for the sleeves to save a temper tantrum later when you go to sew the coat inner and outer together. go ahead and take all 4 sleeves to the ironing board and press up a 1/2" hem along the bottom of the cuffs. i hope you thank me later.


okay, set the sleeves in a safe place away from all rotary blades and let us turn our attention to the bodice. place one of your back pieces on a flat surface and with right sides together, match up the shoulders of the 2 front pieces. pin in place and sew with a 3/8" allowance both of the shoulder seams as shown by the black lines below. repeat with other bodice pieces.

 
take both of the bodices over to the ironing board and press out those shoulder seams.


now, just as instructed in the pattern on page 18, fold your sleeve to find the center and match it up one of the shoulder seams of your bodice. with right sides together, pin in place and then grab another 100 pins to ease that sleeve into place. since this is a sew along, i will not go into as much detail as i did in the pattern, so if you get stuck - please reference the pattern. you can do this! :) once eased and pinned, take over to the sewing machine and sew the sleeve to the bodice with a 3/8" seam allowance. repeat with the other 3 sleeves.


now, give yourself a big ole pat on the back. one of the hardest parts is done. yipee! once again, there is no need to finish these seams as they will be enclosed. take the 2 bodices over to the ironing board and press the sleeve seam up towards the bodice as shown below. repeat with all sleeves.


and now my dearys, day 1 comes to an end. you should have 1 outer bodice with sleeves and 1 inner bodice with sleeves. rock on girls. 

tomorrow we will pick back up with the pocket, skirt and trim construction. don't forget to join in the fun on the brownie goose lovers page on facebook. this group is an awesome place not only for sew along questions but also for general BG questions and just a good time with lots of creativity!

xoxo - amy

Friday, January 10, 2014

baby it's cold outside...a stylish sew along from BG

i am a true southern, low country girl. i keep my toenails painted, i use my manners (this may surprise some of you), i never miss the opportunity to soak up vitamin D (although nowadays slathered with SPF 50), i enjoy the smell of the salt marsh, i can look at the river and tell you if the tide is coming in or out and i feel confident i could hold my own at the dinner table with the ghost of emily post. and most of all, i am not a fan of cold weather. seriously. if it drops below 55, don't expect to see me outside. this was great, grand and wonderful growing up in savannah as the weather there is mild. however, in my dear city of athens...it gets a little cold. and this week i have learned complete and utter respect for anyone that lives in a place that it gets really cold. seriously, hats off (well, maybe not in the cold) to you. i certainly wouldn't make it. oops.

with all of this said, i will admit that i have a canary yellow long coat with a big collar that makes me happy on cold days. so, in a way...a jacket can make all the difference in the world. enter this sew along.

let's turn this dress


into this TOTALLY reversible coat (i promise to get pics of it actually on my kid sometime soon, we've just been dealing with the crappy terrible 2s lately with nash and i seem to be losing my mind and motivation/efficiency).


who's in?

great. now this will start next week. but, i wanted to go ahead and put this out there today for those of you that may want to grab some fabric. if you don't already have the pepper dress pattern, no worries my friends. i may have just reduced the price of it in my etsy store for the sew along. ;)

here is a link for the materials needed for the dress. i have not gone through and done a seperate chart for the sew along (remember that issue about motivation??) but i will list below the changes you may need to adjust for:
  • the bodice - i have this listed on the materials needed with it including the lining. so, for the pepper coat, what you can do is take the requirements and half it. so, if it said you needed 1 yard for the bodice (i am using simple math here, still not finished with morning coffee) on the chart - you will need 1/2 yard for the outside fabric of the bodice and 1/2 yard for the inside fabric for the bodice. clear as mud?
  • the skirt - since you will be making 2 dresses in a nut shell and then sewing them together, you need double what the chart has listed. so, if it requires 3/4 yard for the skirt, know you will need 3/4 yard for the outside skirt and 3/4 for the inside skirt. i took about 2" off the measurement of the skirt for my coat just to shorten it a bit, this is totally up to you but shouldn't make a huge difference in fabric requirements.
  • sleeves - again, double this since you will be making 4 sleeves instead of 2. so, if it says you need 1/4 yard, you need 1/4 yard for outer sleeve and 1/4 yard for inner sleeve.
  • contrasting sleeve band - i changed this up a bit since the construction of the sleeves is how we make it reversible, but with that said...i feel you are fine with 1/8, but remember you will need it for both inner and outer fabrics.
  • inseam pockets (this is totally optional, but i find it is a great thing to have on a coat) - if you want to do pockets for both layers, double this. so, instead of cutting 4 pockets, you will cut 8. you certianly don't have to do pockets for both layers, but i wrote the tutorial including that info, so it may be helpful AND your little miss may find it fun to have hidden inner pockets. :)
  • bodice trim - i have extended the trim down the front side of the jacket. i think it looks really great. so, you will need what is required plus the length of the skirt. you only need 1 as it is sandwiched between the 2 layers. more details of this trim are included in the pattern tutorial.
  • back tab - again, double if you want a tab for both layers.
  • buttons - same with back tab. but, the front of the jacket - this is all up to you. i just put 2 on the one i made for louisa, but only because that was how many i had in my stash. feel free to add more or just put one around the waist and let the top flap down to expose the inner fabric. :)
i think that covers it. and hopefully it makes sense. in essence, as i said...you are sewing 2 dress shells (meaning not lined) and then sticking them together to make one, big completely lined dress. it really is awesome.

now, fabrics. here is what i suggest:
  • quilter's cotton - this is what i used. i treated myself to some joel (it has been far too long since i sewed joel) and used cotton for both inner and outer. it makes a great spring-weight coat but i don't find it will be very warm.
  • so, if you need warmth, how about a fleece or a minky for the inner fabric? that would not only provide warmth but also softness if it was worn on the inside.
  • you can also line the jacket with flannel if you wanted to. i didn't include that in the instructions, but it wouldn't be hard to do at all and that way you could have a cotton both inside and out and still have warmth. (meaning put a layer of flannel between the 2 cotton layers so it isn't seen)
schedule time. let's start this sew along middle of next week. here is how it will work on the blog. 


now, if you aren't able to start on wednesday, or if you start and aren't able to finish...don't stress! i will not take this info off the blog and i ALWAYS have a link on the top toolbar for sew alongs. basically, this sew along isn't going anywhere! but, the pepper dress pattern will return back to regular price next week, so make sure you grab it on sale!

oh and before i forget - i am sure there will be lots of sharing, trouble-shooting, tips and fun on the brownie-goose lovers page on facebook. if you haven't joined yet - come on in and see what fun we have!

xoxo - amy